Latest posts

Convert PFX Certificate

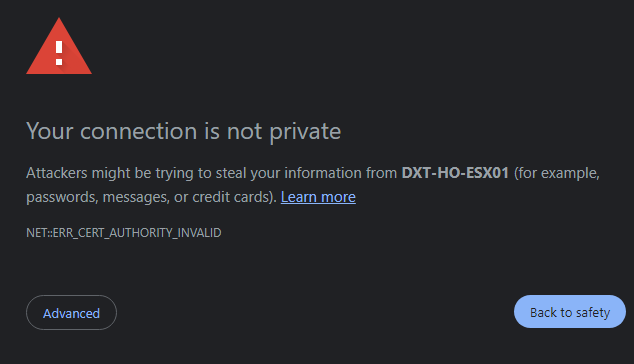
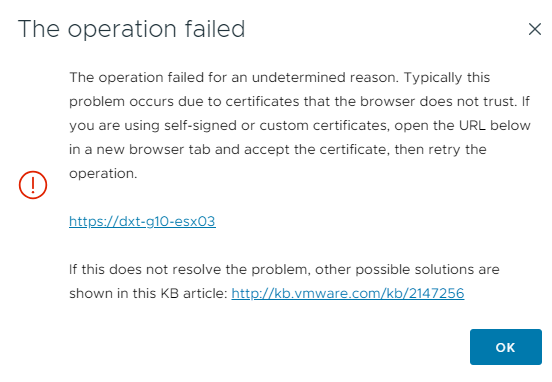
While having your SSL/TLS certificate in a PFX file is great, as most applications support the PFX file, there are still some cases where a PFX file is not supported, and you need the certificate in the PEM format as a CRT file (also called a CER file) with a key file (also called a PEM file).

In this post, I will show you step-by-step how to convert a PFX file into a single file or individual files with and without passwords each method supports the PEM format.

Prerequisites

  • OpenSSL binary installed. You can find the OpenSSL binaries on the OpenSSL wiki.
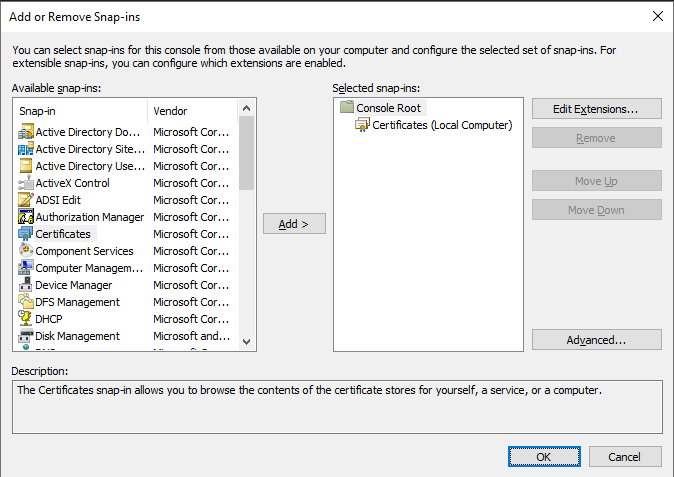
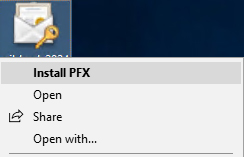
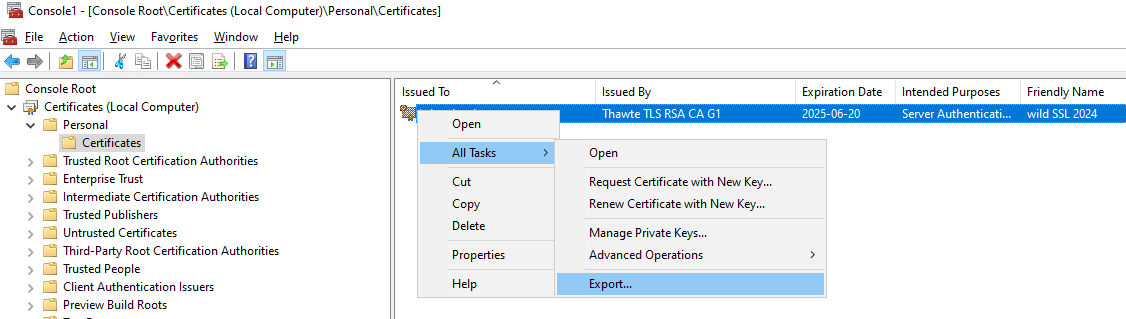
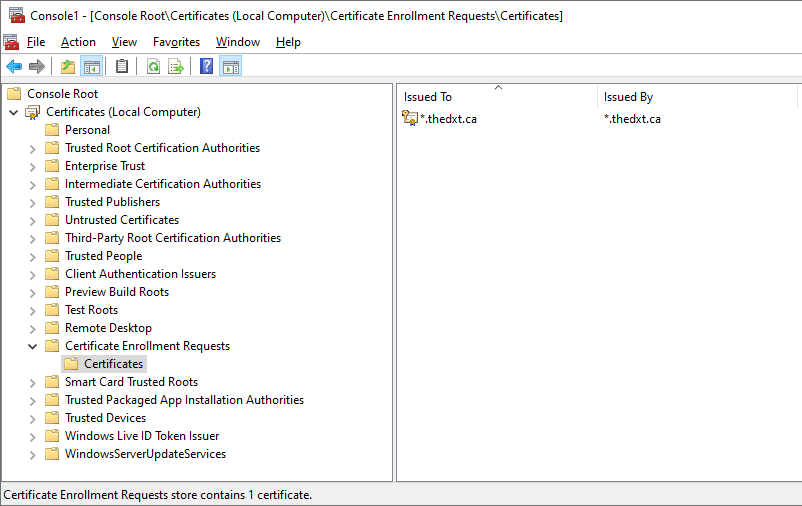
  • Exported certificate as a PFX file. If you need to learn how my post on Exporting a Certificate with MMC details all the steps.
  • Password for the PFX file.

The Process

  • Place your PFX file in a working directory. I will be using C:\SSL as my working directory.
  • Open command line. You can use Linux or Windows. The commands are all the same regardless of which OS you are using. I will be using Microsoft Windows with Windows Terminal and PowerShell.

Depending on your needs, you may need to convert your PFX file in several different ways. Here are the methods that I will cover.

All of the commands below will use the following options.

  • pkcs12 tells OpenSSL that the file it is being fed is a PKCS#12 file. PKCS#12 is another name for a PFX file.
  • in tells OpenSSL where the source file is.
  • out tells OpenSSL where to store the converted file.

Install VMware Horizon Connection Server Certificate

Installing an SSL/TLS certificate on the VMware Horizon Connection Server is a common task. The whole process may feel daunting if you’ve never installed a certificate on the Horizon Connection Server.

VMware Horizon has had a few names, and some of those old names are still present at its core. VMware Horizon was originally called VMware VDM (Virtual Desktop Manager), later renamed VMware Horizon View, and today, it is called Horizon.

In this post, I will show you step-by-step how to install a certificate on the Horizon Connection Server and update the VMware Unified Access Gateway appliance to reflect the changes.

Prerequisites

The Process

The process is broken up into two sections. The first section details the steps needed on the VMware Horizon Connection Server, and the second section details the steps needed on the VMware Unified Access Gateway appliance.

VMware Horizon Connection Server

  • Connect to your Horizon Connection Server
  • Open MMC.
  • Add the Certificates Snap-in.
  • Select Computer account and click Next.
  • Select Local computer and click Finish.
  • Click OK to close the Add or Remove Snap-ins window.
  • Expand out Certificates (Local Computer) > Personal > Certificates.
  • You will see that one of the certificates has the friendly name vdm.

Install VMware vCenter Certificate in Windows

The VMware vCenter root certificate is an essential part of vCenter. When you install vCenter, it also installs the VMCA (VMware Certificate Authority) in your vCenter. The VMCA is a barebones CA for vCenter that issues certificates to the various elements of vCenter as needed.

You should install the VMCA root certificate on your system because not all web browsers trust it. After installing the root certificate, your web browsers will trust the certificates on your ESXi hosts in your vCenter, as they use certificates issued by the VMCA on your vCenter.

Installing the VMware vCenter certificate will help prevent errors. Such as the invalid certificate error NET::ERR_CERT_AUTHORITY_INVALID.

The operation failed error is another one that can present itself when uploading files to a datastore.

Another error is the invalid server certificate error in PowerCLI.

Connect-VIServer

Error: Invalid server certificate.

Use Set-PowerCLIConfiguration to set the value for the InvalidCertificateAction option to Prompt if you'd like to connect once or to add a permanent exception for this server.

Additional Information: Could not establish trust relationship for the SSL/TLS secure channel with authority 'vcenter'.

At line:1 char:1
+ Connect-VIServer -Server "vcenter"
+ ~~~~~~~~~~~~~~~~~~~~~~~~~~~~~~~~~~
+ CategoryInfo          : SecurityError: (:) [Connect-VIServer], ViSecurityNegotiationException
+ FullyQualifiedErrorId :
Client20_ConnectivityServiceImpl_Reconnect_CertificateError, VMware.VimAutomation.ViCore.Cmdlets.Commands.ConnectVIServerCode language: plaintext (plaintext)

In this post, I will show you step-by-step how to install the VMware vCenter root certificate in Microsoft Windows.

The Process

  • Go to the URL of your vCenter.
  • Off to the right, there’s a link that says Download trusted root CA certificates.

Install PFX Certificate in Windows

Once you have exported your certificate, the next step is installing the certificate PFX on other servers as needed.

In this post, I will show you step-by-step how to install an exported PFX certificate file on a Microsoft Windows system.

Prerequisites

The Process

  • Copy the exported certificate PFX file to the server on which you need to install the certificate.
  • Right-click on the PFX file and select Install PFX.
  • Select Local Machine and click Next.

VMware Unified Access Gateway Certificate Install

Installing your own certificate is one of the first things you’ll need to do when setting up the VMware Unified Access Gateway appliance.

In this post, I will detail step-by-step how to install a certificate on the VMware UAG.

Prerequisites

The Process

  • Login to the UAG
  • Select Configure Manually.
  • Under Advanced Settings, click on TLS Server Certificate Settings.

Export a Certificate with MMC

If you work with wild card certificates, it’s common to need to deploy them to more than one server. You will need to export the certificate to install it on other systems.

In this post, I will show you step-by-step how to export a certificate using MMC (Microsoft Management Console).

The Process

  • Connect to the system that has the certificate you want to export.
  • Open MMC.
  • Add the Certificates Snap-in.
  • Select Computer account and click Next.
  • Select Local computer and click Finish.
  • Click OK to close the Add or Remove Snap-ins window.
  • Right-click on the Certificate you want to export and click Export.

Complete a CSR

When you create a CSR and provide it to your certificate vendor or CA (Certificate Authority), you must complete the CSR (Certificate Signing Request).

In this post, I will show you step-by-step how to complete a CSR.

Prerequisites

  • CSR generated on a system that you want to complete the CSR on. If you don’t know how my post Generate CSR with MMC details all the steps.

You can check which system has the pending certificate by checking the Certificate Enrollment Requests in MMC (Microsoft Management Console).

Certificate Pending completion of CSR

The Process

  • Connect to the system you used to generate the CSR.
  • Download the certificate files from your certificate vendor or CA.
  • Right-click on the certificate file and select Install Certificate.

VMware Horizon Desktop Pool without vCenter

You usually want to connect VMware Horizon directly to VMware vCenter, but it can make sense to leave them disconnected from each other in some situations.

In this post, I’ll show you step-by-step how to install the VMware Horizon Agent without using the VMware vCenter integration. You can do this on persistent VDIs and Physical Machines.

The Process

The configuration will be divided into two sections. The first section covers the steps needed on the system that you will install the VMware Horizon agent on, and the second section covers the steps needed on the VMware Horizon Connection Server.

VMware Horizon Agent

  • Launch the VMware Horizon agent install with the command line argument /v VDM_VC_MANAGED_AGENT=0
  • Click Next
  • Agree to the general terms and click Next.
  • Select IPv4 and click Next.

Microsoft 365 Sign-in Page Branding

A custom-themed Microsoft 365 sign-in page can augment the user experience by making it easier to tell if it is a phishing sign-in page, as it will help users recognize whether the login page is legitimate or not. It also adds a nice custom tweak to your Microsoft 365 tenant.

Microsoft 365 Sign-in Page before and after Company Branding

In this post, I will show you step-by-step how to customize your Microsoft 365 sign-in page.

The Process

  • Log in to the Microsoft Entra admin center
  • Click on User Experiences > Company branding
  • Under Default sign-in experience, click on Customize
  • Upload a Favicon that is 32 x 32 pixels and less than 5 KB in size.
  • Upload a Background image that is 1920 x 1080 pixels and less than 300 KB in size.

The background image will be darkened by a black overlay with an opacity of 0.5.

Cloudflare Access IdP with Entra ID

Cloudflare Access is a wonderful tool that can add MFA (Multi-Factor Authentication) to applications that don’t support it.

I’ve previously covered Setting Up Cloudflare Access using email OTP (One-time PIN). What I didn’t cover in that post was how to set up Cloudflare Access with an IdP (Identity Provider).

In this post, I will show step-by-step how to set up Cloudflare Access to use Microsoft Entra ID (formerly Microsoft Azure Active Directory) as the IdP and use Microsoft 365 SSO (Single sign-on) to make everything very transparent to the user.

Prerequisites

  • DNS for the web application in Cloudflare with Cloudflare Proxy enabled on the DNS record. (or a Cloudflare Tunnel)

The Process

  • Click on Custom Pages.
  • Make a note of your Team domain.

For this example, I will be using the team domain test.cloudflareaccess.com

Microsoft Entra ID Configuration

  • Login to Microsoft Entra admin center.
  • Click on Applications > App registrations.
  • Click on New registration.
  • Name your application. I will use the name Cloudflare Access.
  • Select Accounts in this organizational directory only (Single tenant)
  • Set the Redirect URI platform to Web.
  • Set the Redirect URI to the URL of the Team domain you noted down earlier. Add https:// to the front of it and add /cdn-cgi/access/callback to the end of it.