Introduction to LINQ by Akshay Phadke on Scribd
Thursday 29 December 2016
Tuesday 10 March 2015
Installing SQL Server 2008 R2 On Windows Server
Installing
SQL Server 2008 R2 Client
In this blog let us look at the
steps involved in installing SQL Server 2008 R2.
In order to have a smooth
installation, restart the PC before beginning the SQL Server client
installation. If the pc has a pending reboot, it would throw out a request to
reboot in the middle of the installation, at that point you will have to reboot
the machine and again restart from this step…
Start by double clicking the setup.exe in the installation folder of
SQL Server 2008 R2.
You should be seeing a popup
window as below.

In the initial screen, you will
find that Planning section is bold (chosen) be
default (look in the left side section), click on Installation.
Picture below shows the screen
when you click on installation.
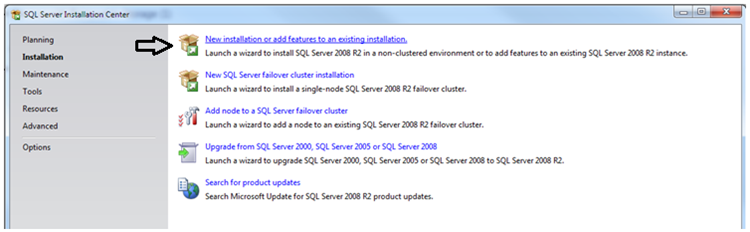
Once you are in the Installation page, look at the first option
from the top; New installation or add
features to an existing installation. It goes to the next screen
(shown below) which does few initial checks before starting the installation.
Warnings can be ignored (it may not be mandatory setting). If you find any
failures, try to address them (you can know more info by clicking Show details button). Click OK.

In the next step, you need to
enter the Product Key found on your installation media. Click Next to continue.
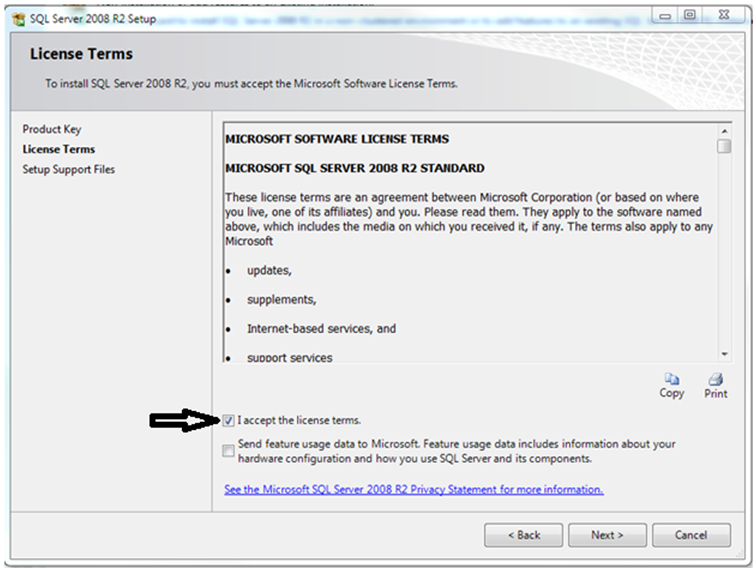
In the License Terms screen,
select the option against “I accept the license terms”.Click Next. (Image below)
Support Files step, click Install button. (Image below)

It would then install a series
of support files that are required for the setup to continue installing.
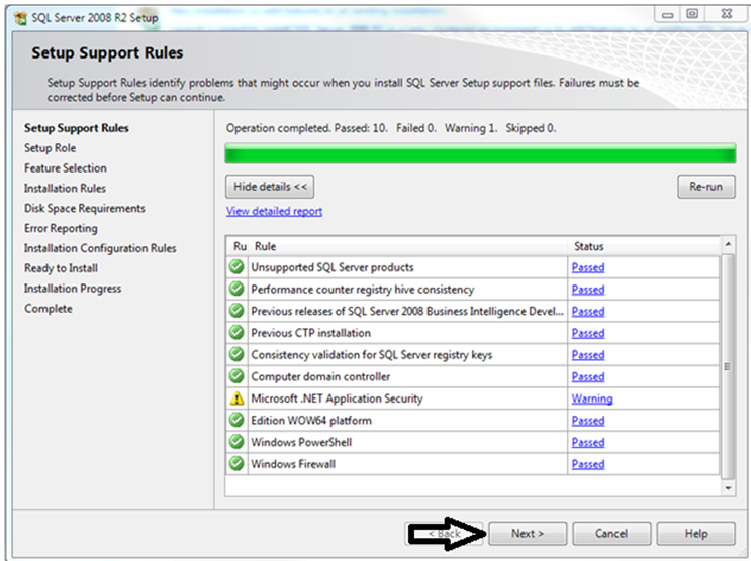
The above image shows the same
screen after the setup support components are installed. Again ensure that you
do not have any failures, warnings can be ignored. Continue the installation by
clicking Next.
In the Setup Role step, choose SQL Server Feature Installation. This option presents the
opportunity to choose what components need to be installed, so a custom list of
components can be chosen. Click Next to continue.

In the next screen, do not
select anything under Instance Features. Only the Shared Features listed below
should be selected.
§
Client Tools Connectivity
§
Client Tools Backwards Compatibility
§
Client Tools SDK
§
SQL Server Books Online
§
Management Tools – Basic (Including the sub selection of
Management Tools – Complete)
§
SQL Client Connectivity SDK
§
Microsoft Sync Framework
Click Next to continue…
It would perform a check for
the installation rules and displays the results as shown below. Note that
warnings might not stop the installation and you should be looking to see that
there are no failures…

continue…
The next step displays the disk
space information such as how much disk space it needs to install the chosen
components and how much disk free space available on the local
disk..

Click Next to continue…
The next screen asks if you would like to send Error Reports automatically
to Microsoft. It is not mandatory and the installation would be able
to continue even if the option is unchecked….
Click Next to continue…

In the Installation
configuration rules, ensure that there are no failures and click Nextto continue.

This is summary step,
displaying the features you have chosen to install… Continue to the
installation by pressing Install button..

Installation continues
depending on the number of components we have chosen and the system
configuration where you are performing the installation.
Subscribe to:
Posts (Atom)